

Firebase is a Google service. For “Push notifications” and “Firebase Analytics”, we use Firebase.
Push notifications : You can send instant notifications to your users’ devices (mobile phones, tablets etc.)
Firebase Analytics : With Firebase Analytics, you can see several data like active user count, daily interaction of your users, device information of your users, operating systems of those devices, demographic information of your users, countries in which your application is used and many other instantaneously.
Let’s start...
Creating Firebase Project
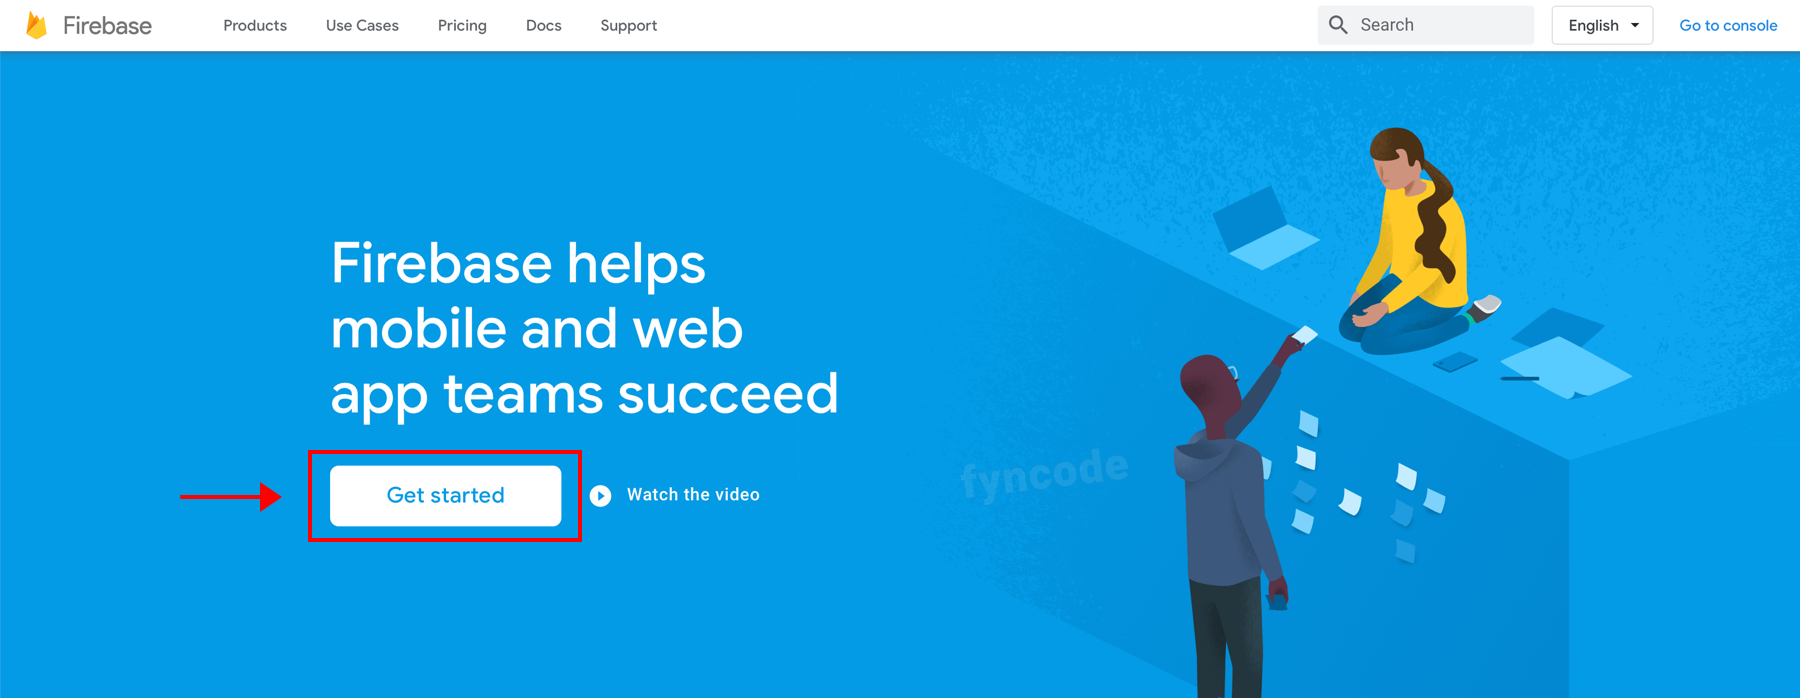
- Since Firebase is a Google service, you need a Google account to use it. Go to https://firebase.google.com and click “Get started” button.
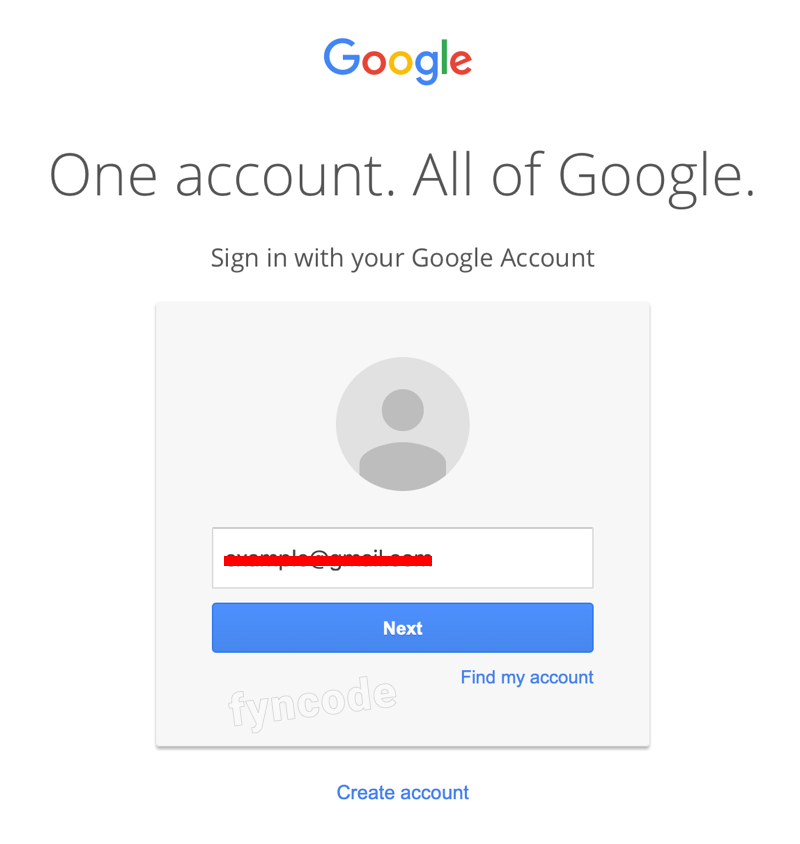
- Login with your Google account. If you don’t have a Google account, you can create a new one and use it to login.
- Click on “Create a project” button.
(Important Note: You will see this screen only if you will create a Firebase project for the first time. If there is any other Firebase project that you created before, then you will not see this page but the page on the next step, to which you should pay attention in this case.)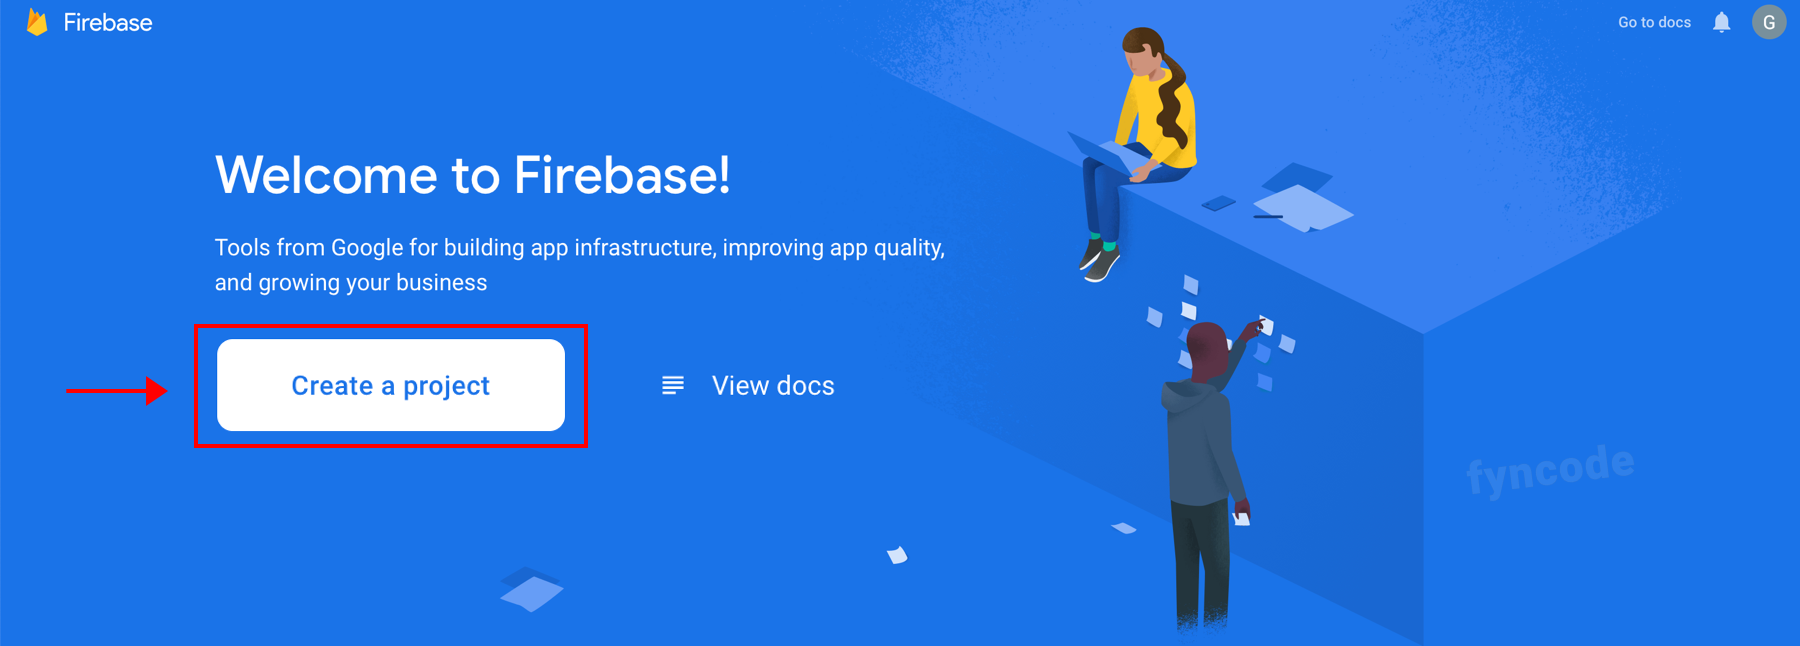
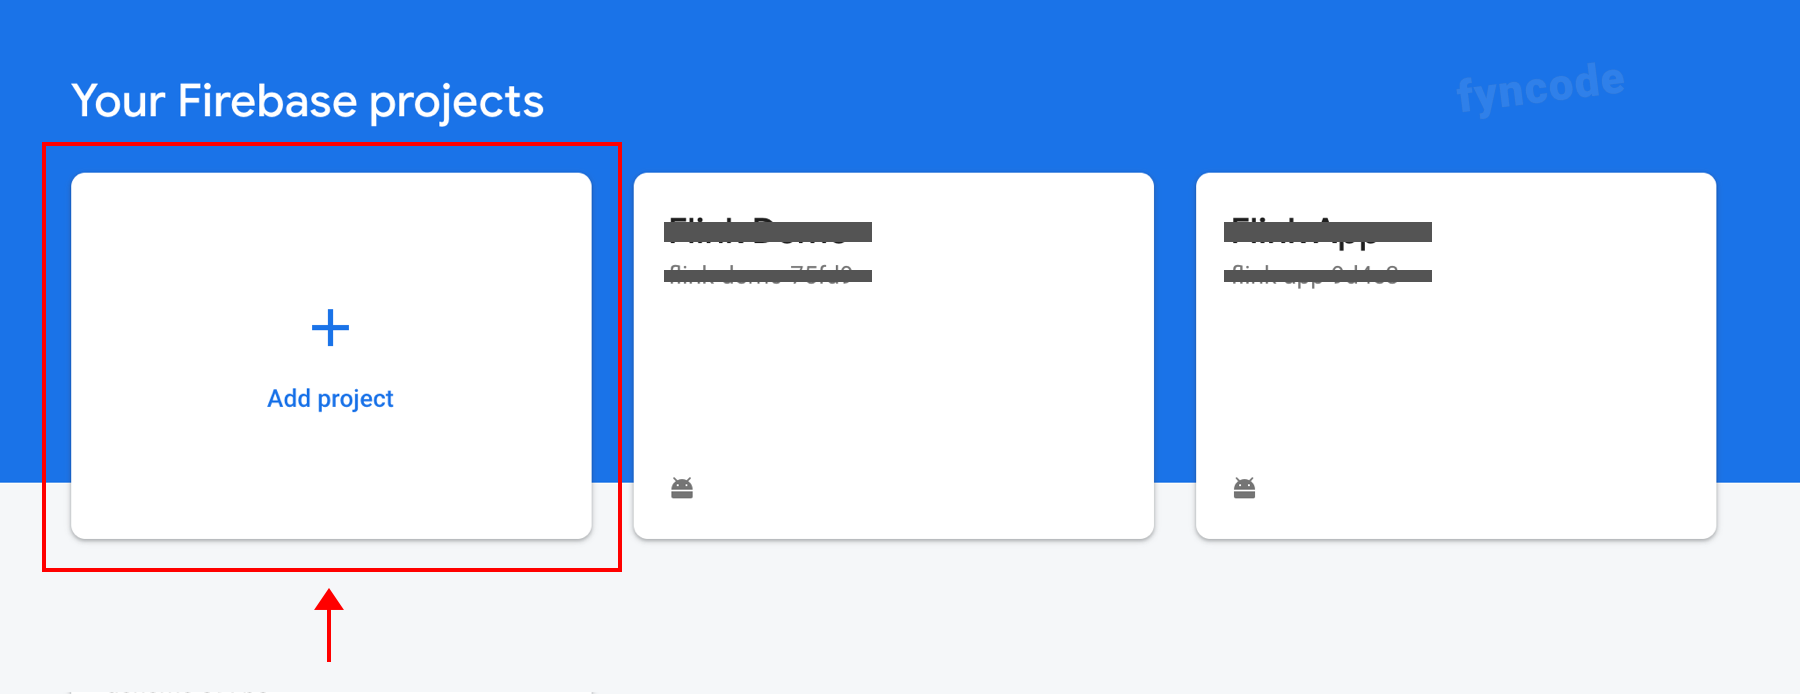
- Click “Add project” button.
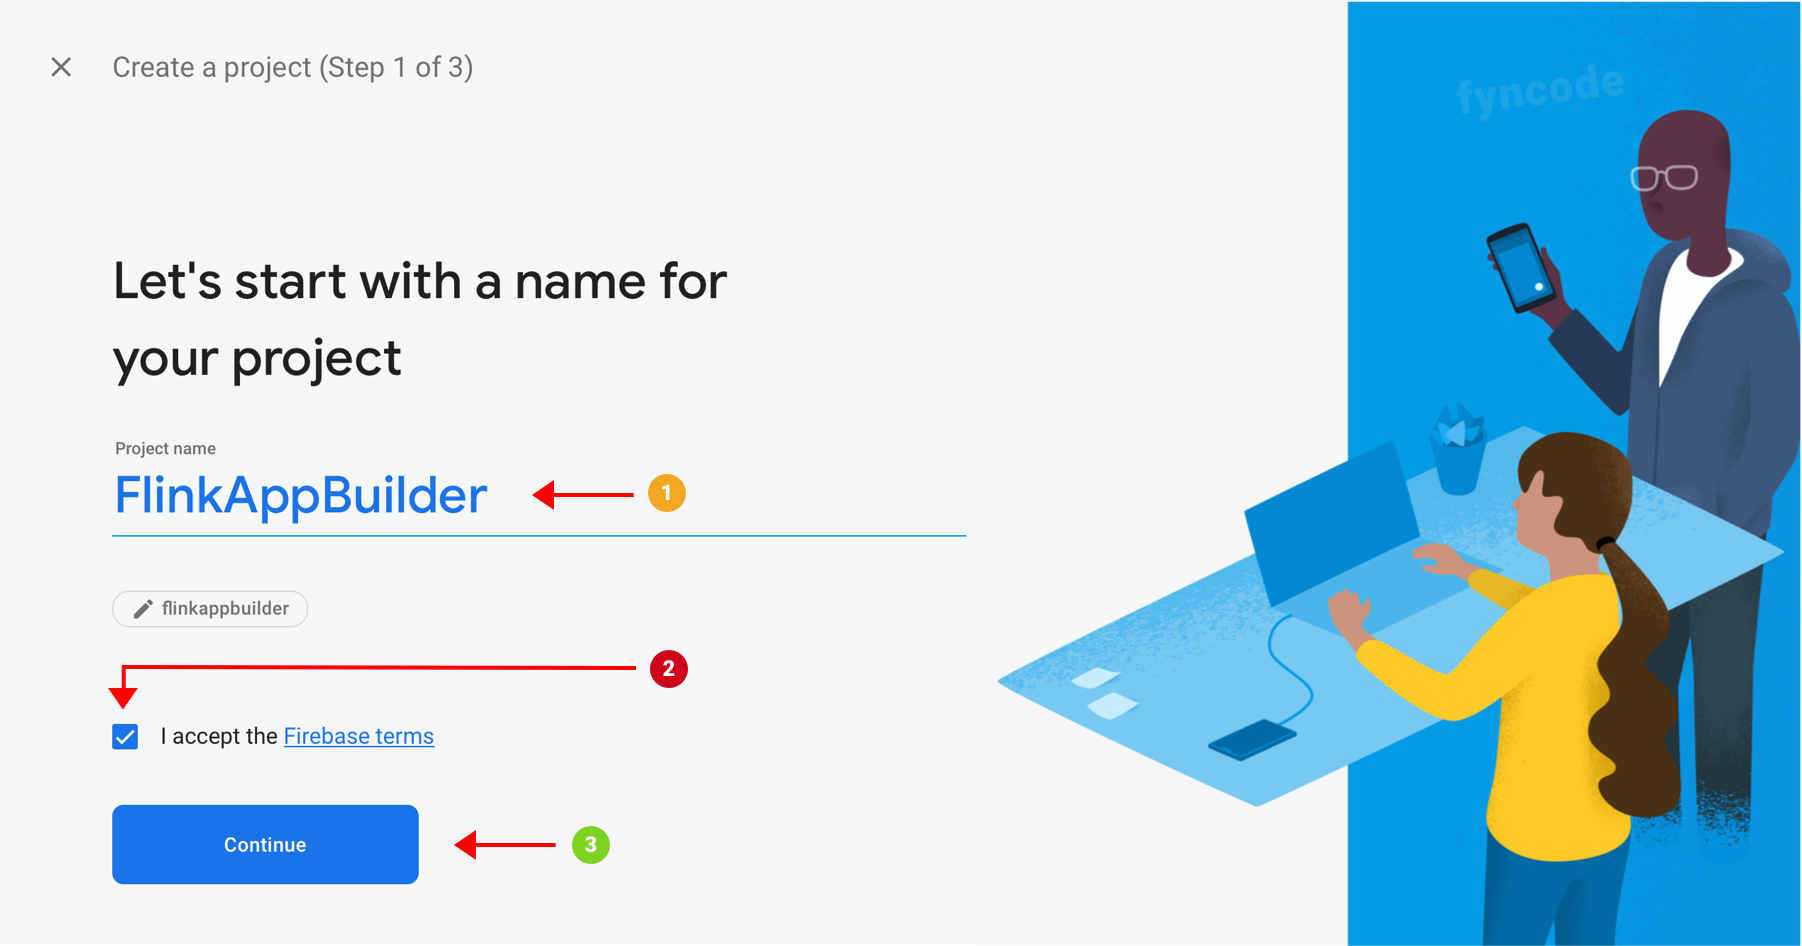
- Enter your project name, accept the Firebase terms and conditions and click “Continue”. (Project name examples: FlinkAppBuilder, BreakingNews etc.)
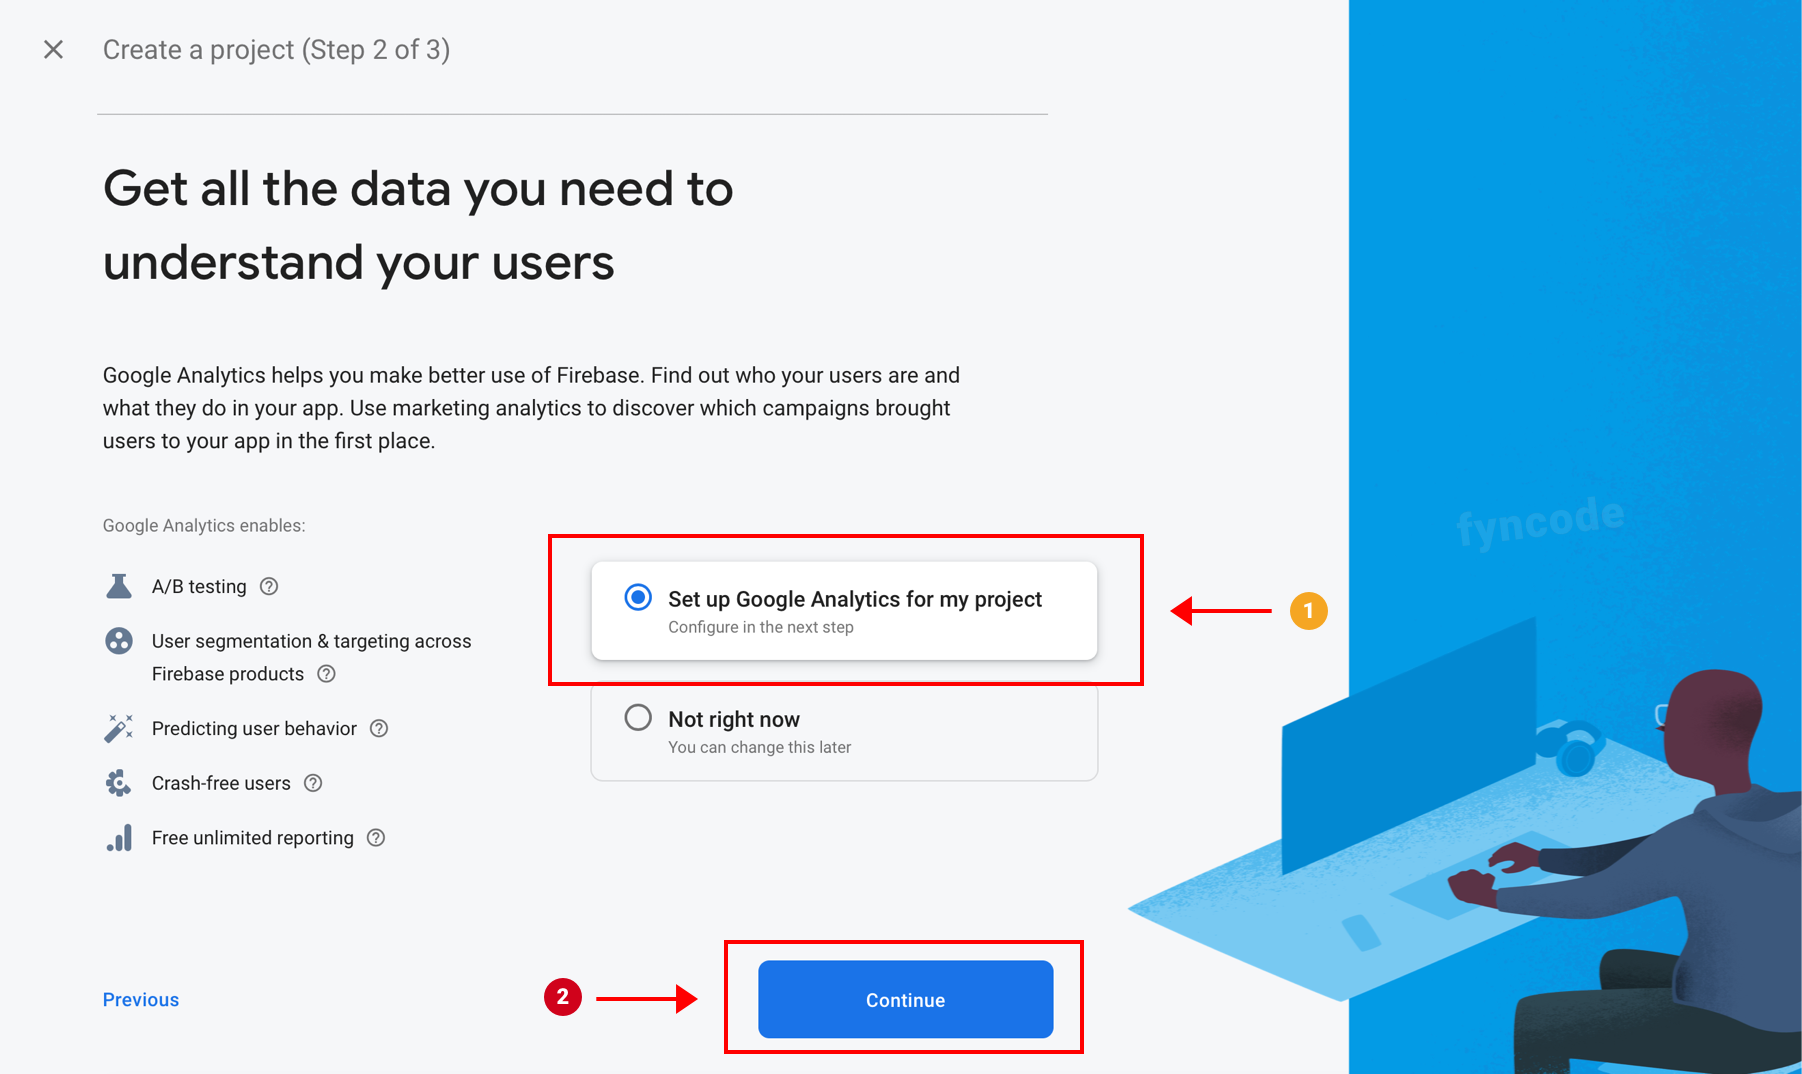
- Select “Set up Google Analytics for my project” and click “Continue” button.
- Click “Select an account” button.
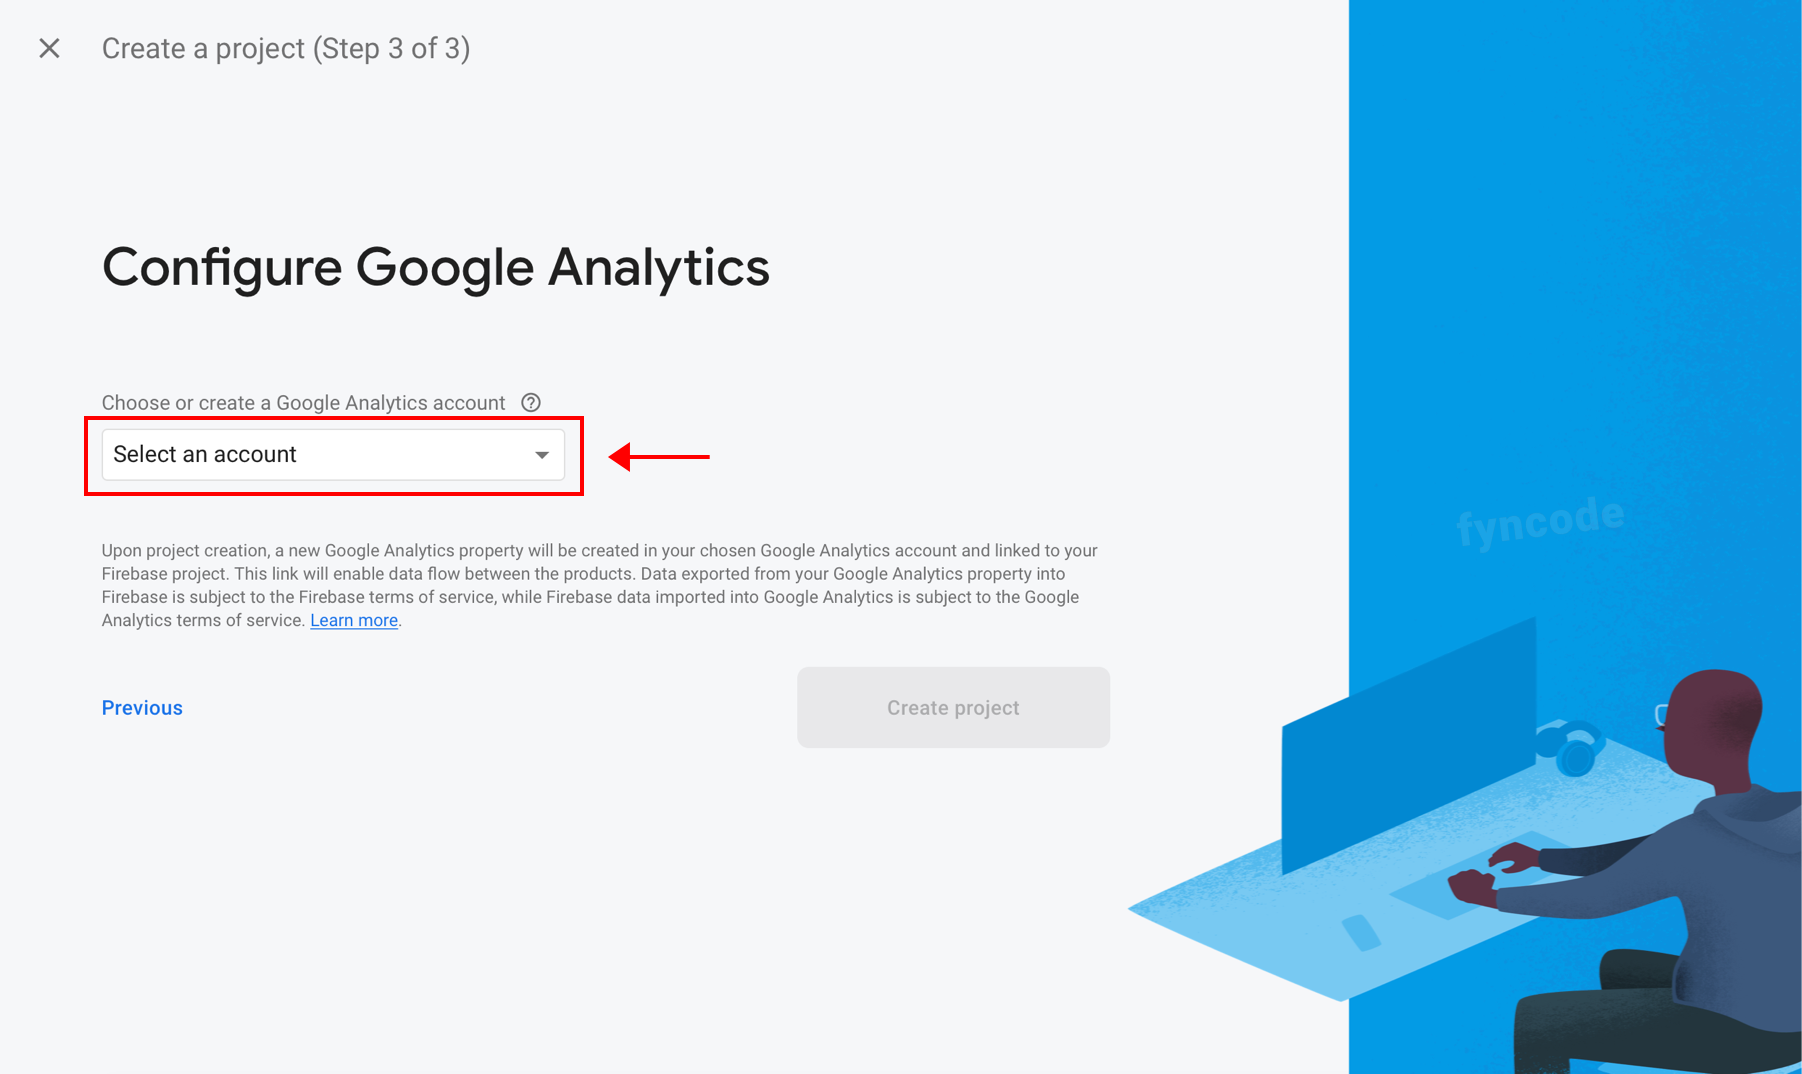
- Click “Create a new account” button. (If you have a previously defined Google Analytics account, you can select it as well.)

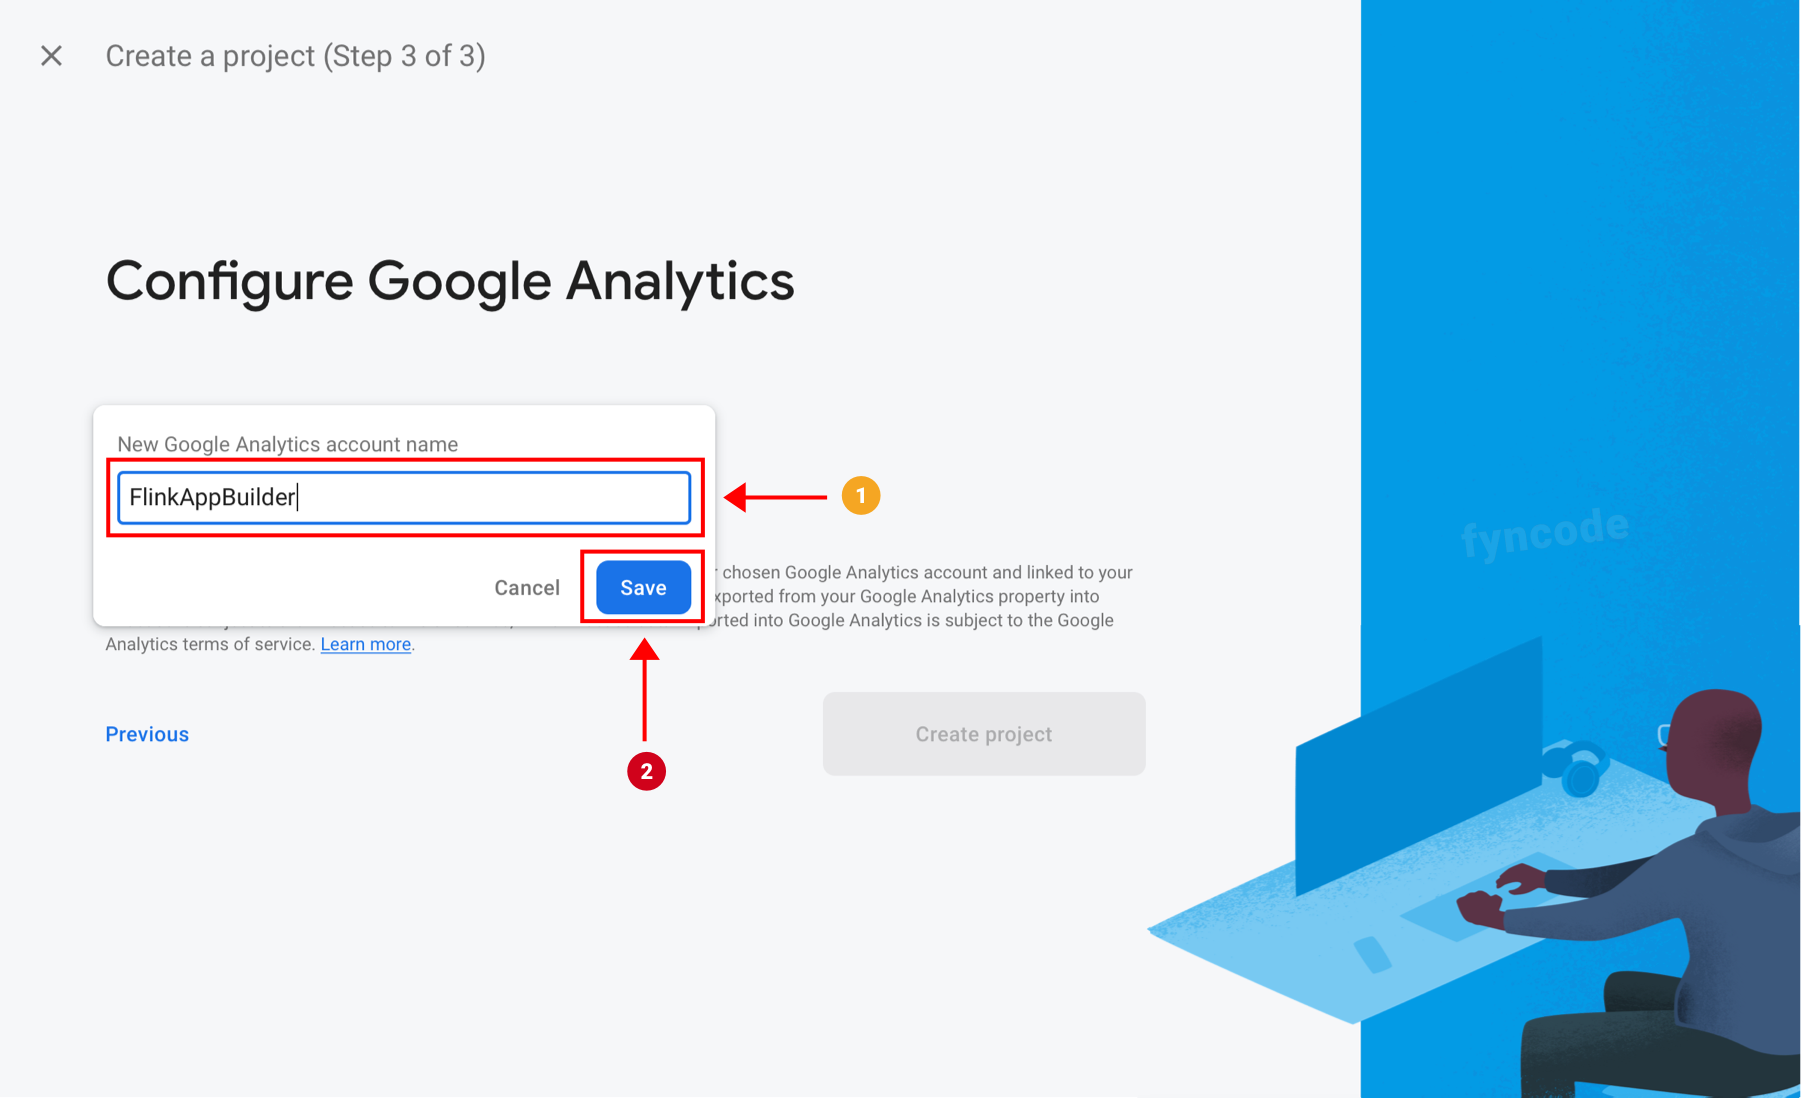
- Define a name for the Google Analytics account that you will create and enter it to the respective field (you can use the same project name that you defined previously or you can define a different account name). Then, click “Save”.
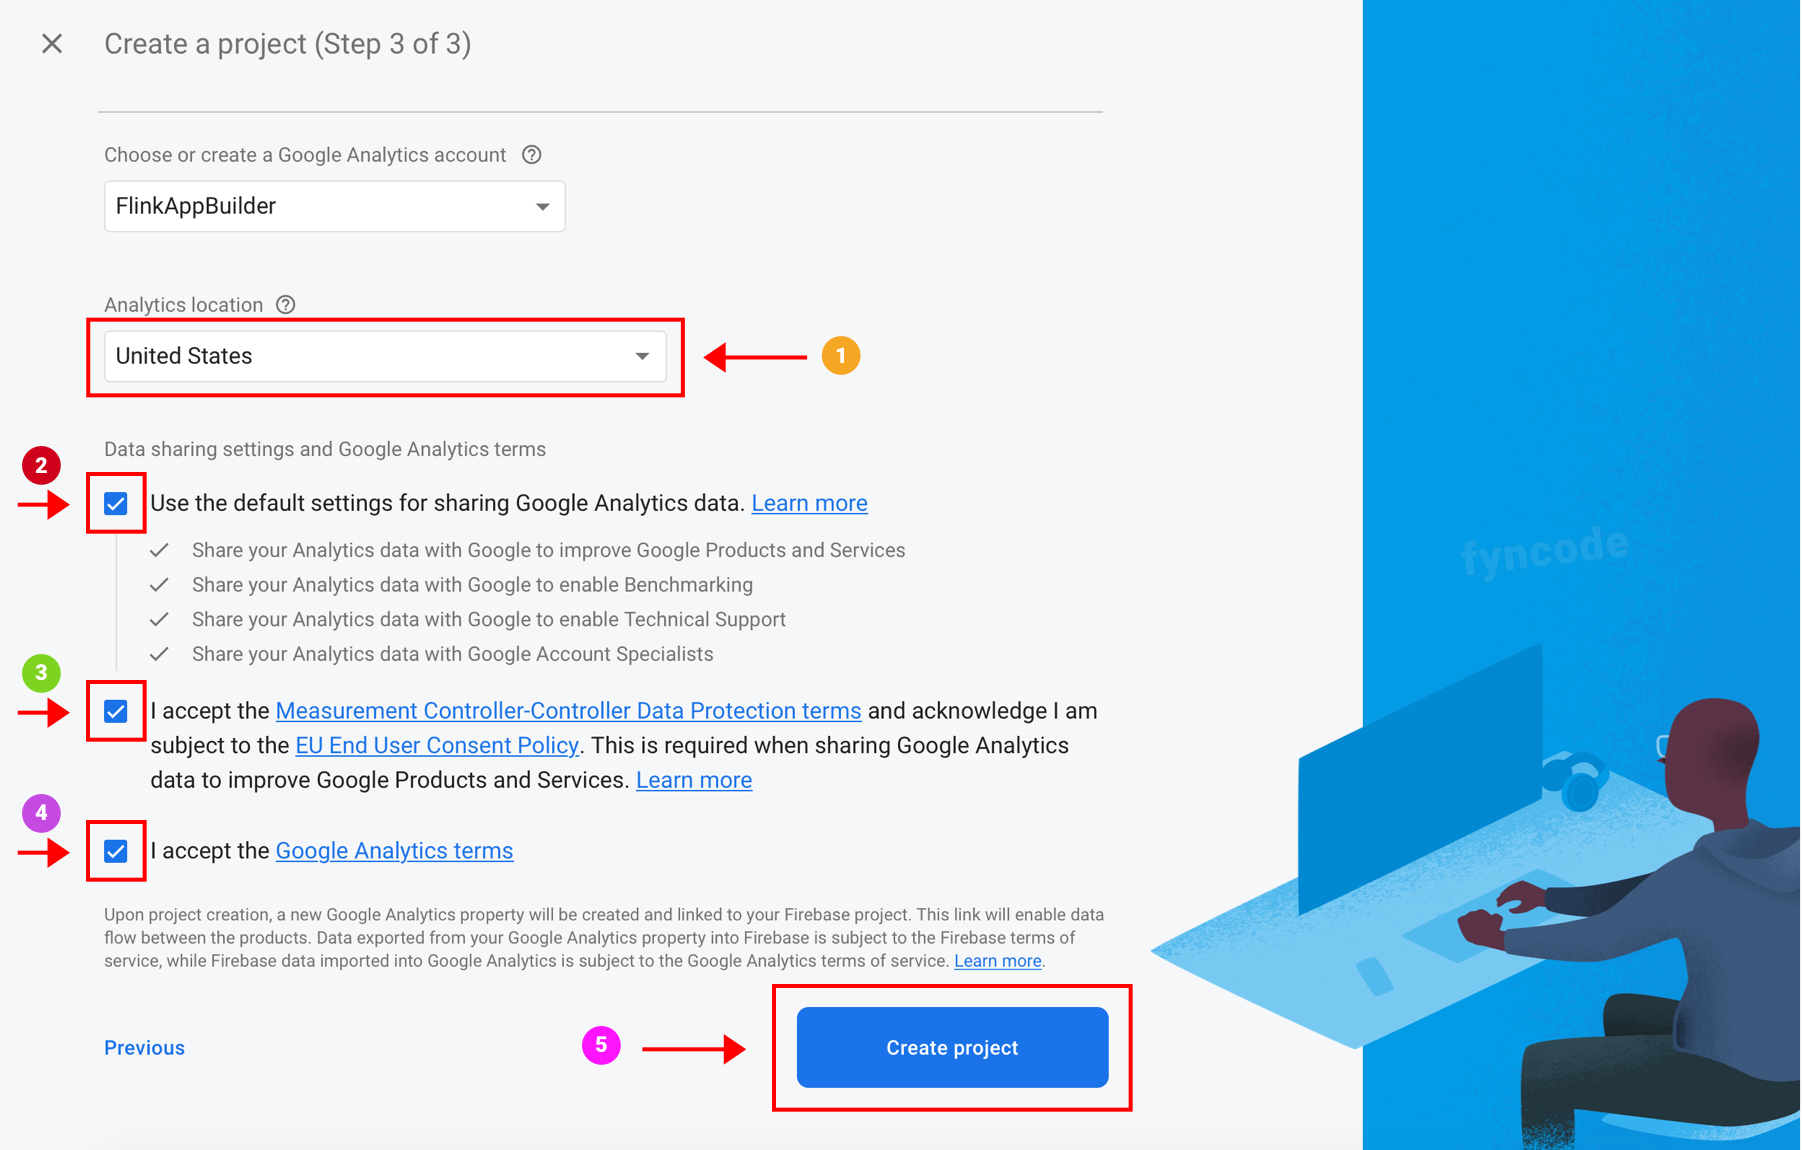
- Select your location, tick all confirmation boxes and click “Create project” button.
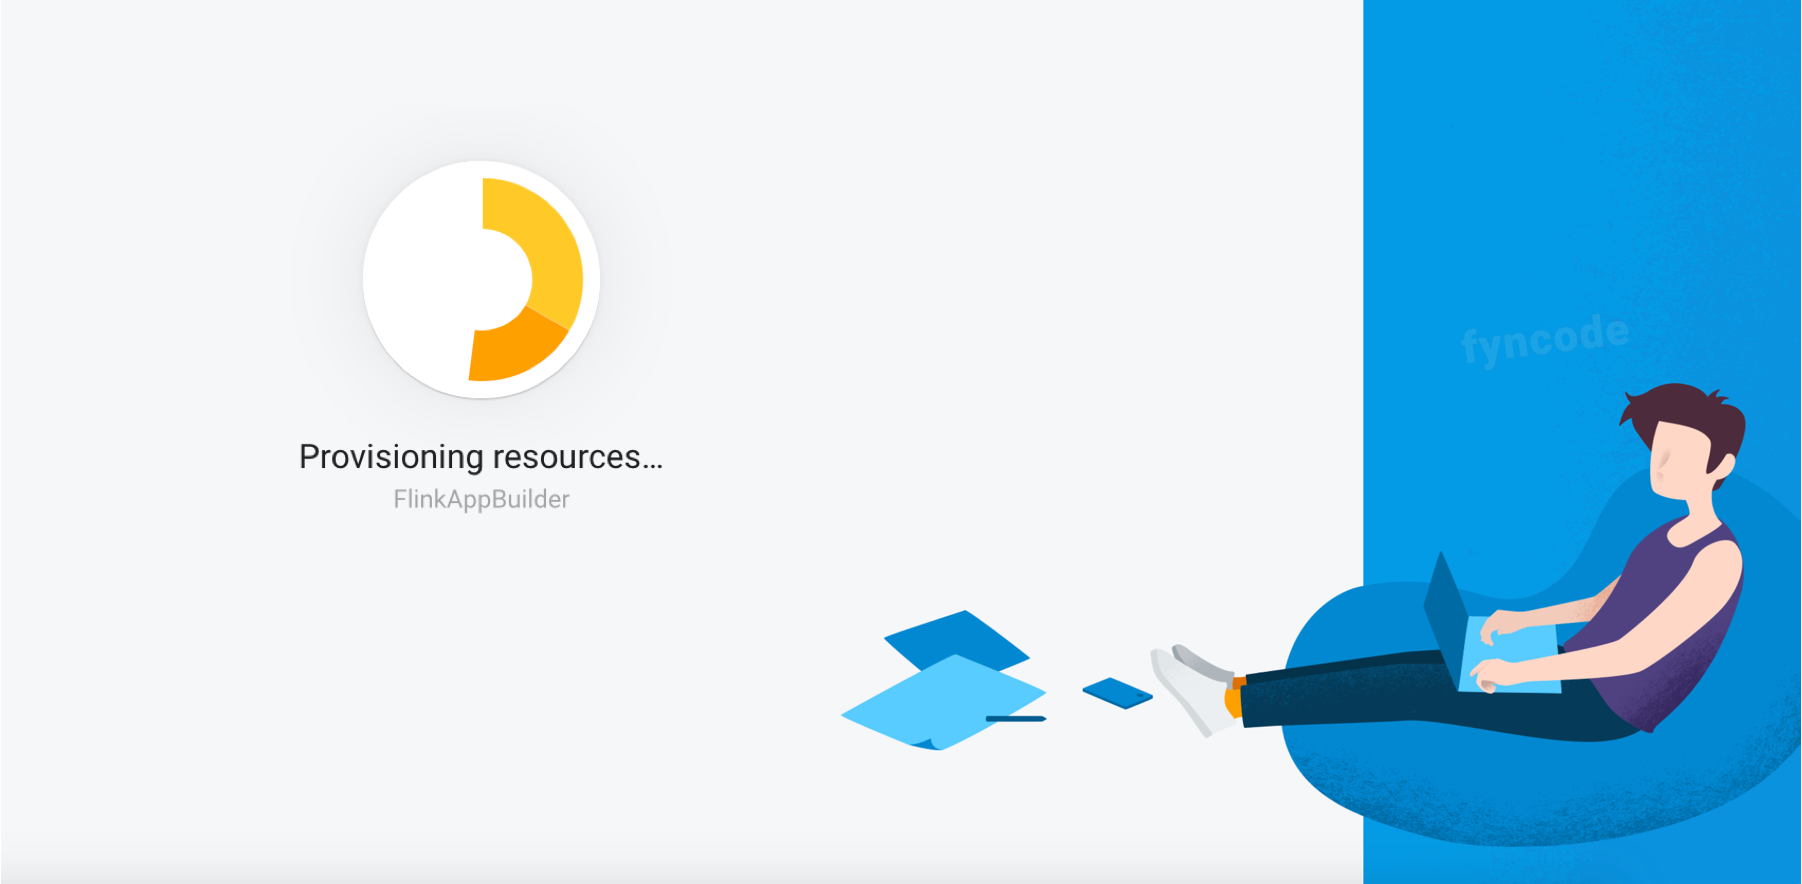
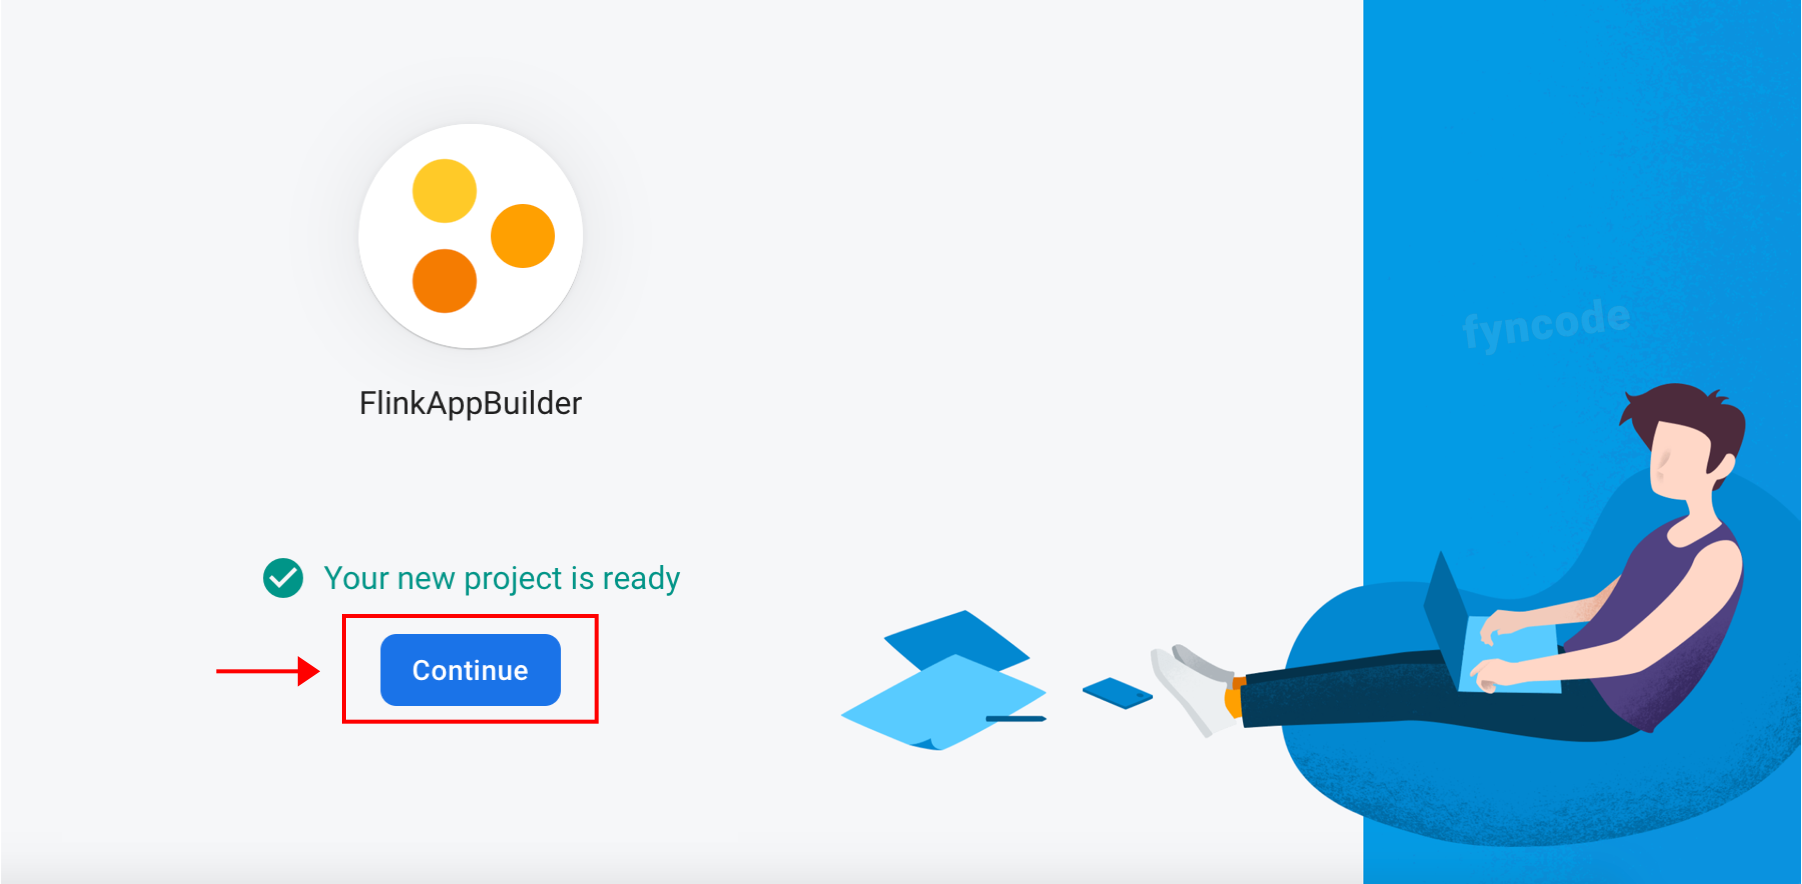
- Your Firebase project will begin to be prepared and you will see an installation page. Please wait while your project is being prepared. After it is ready, click “Continue” button and complete the project creating part.
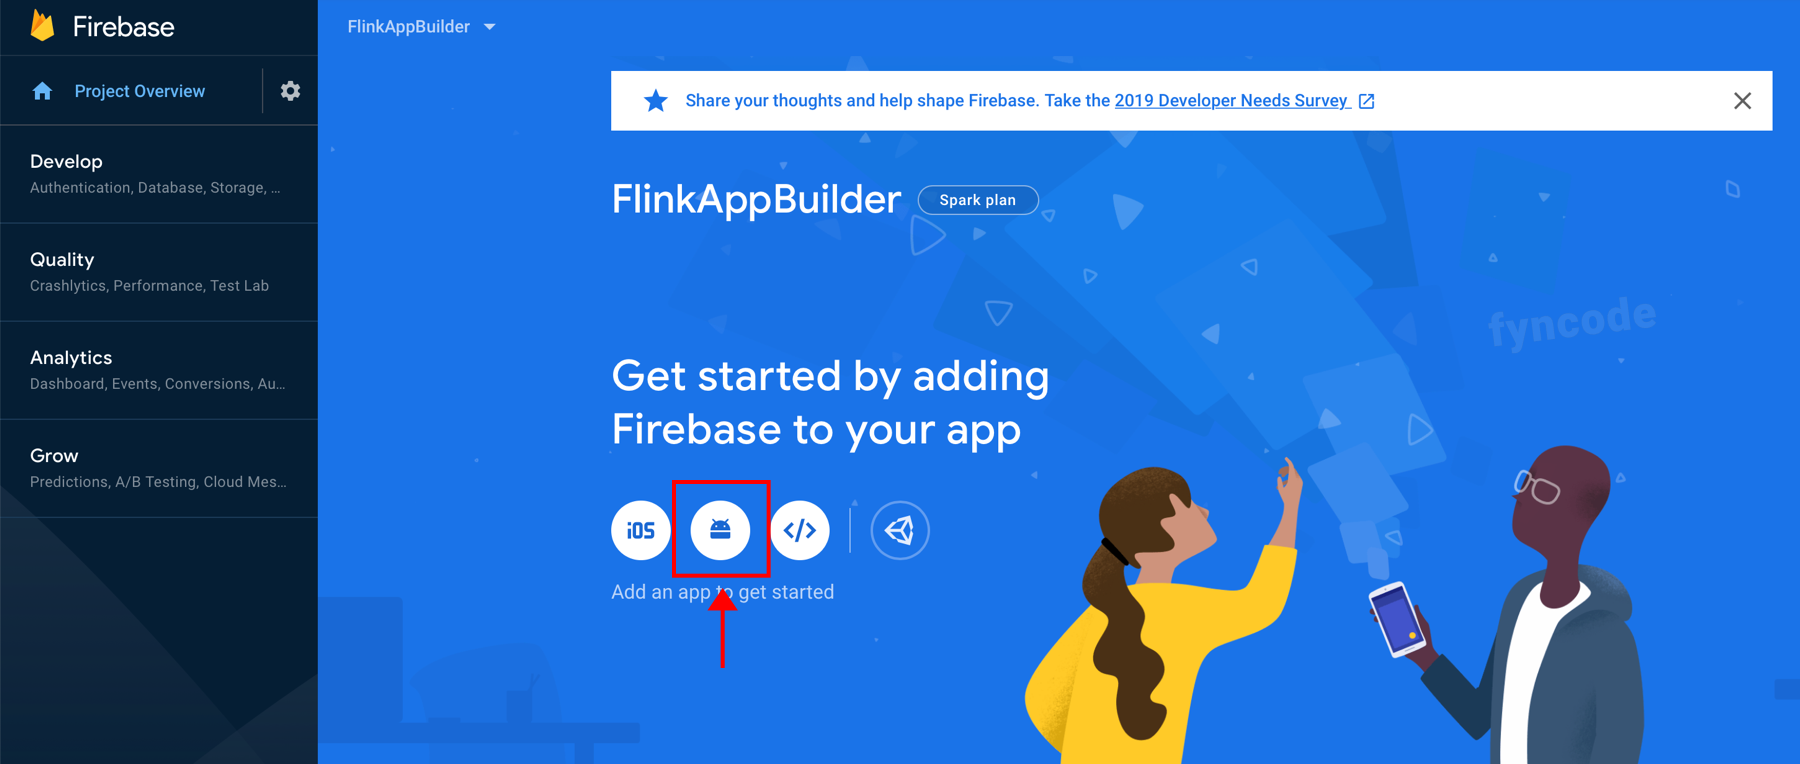
Adding Your Application
- Click on Android icon.
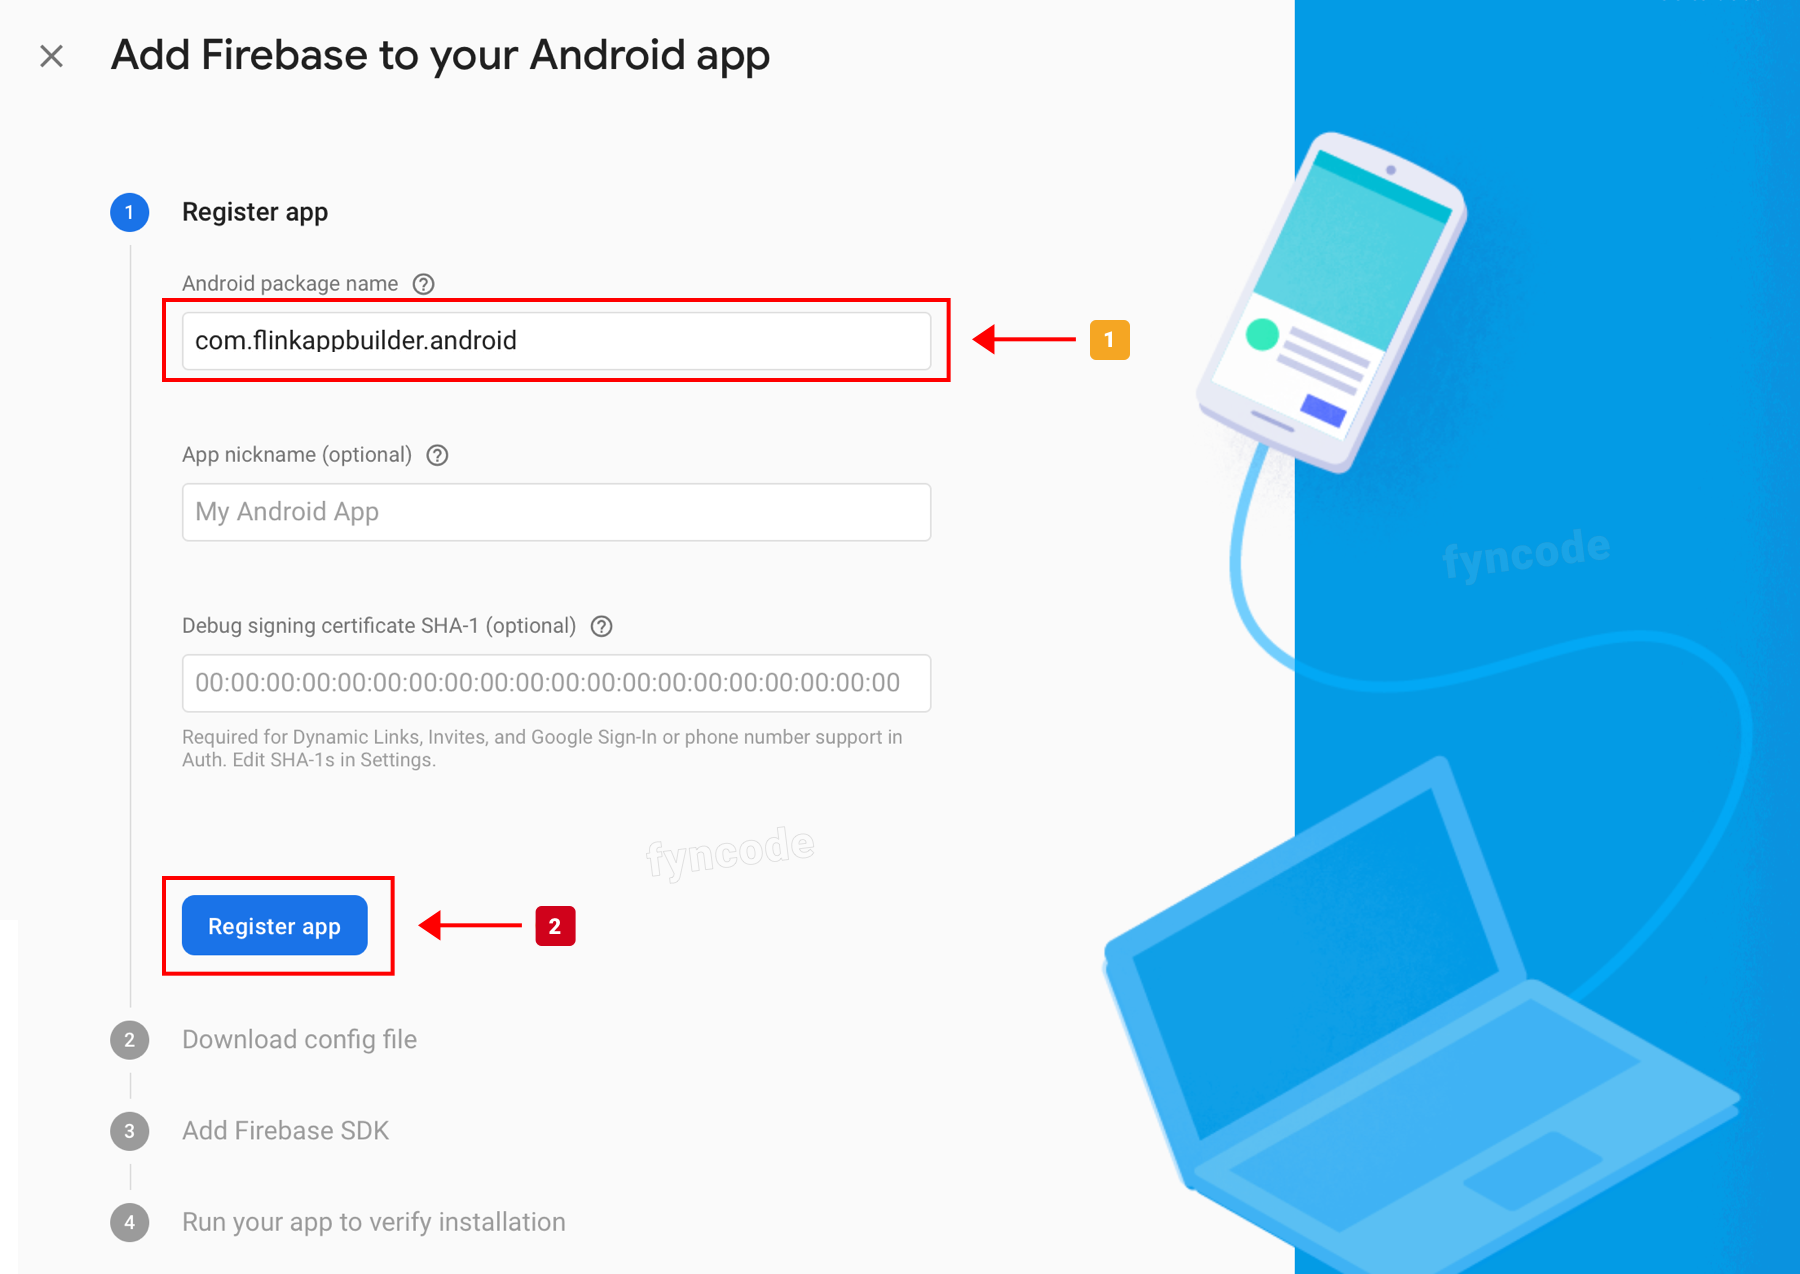
- Enter the application package name that you defined while you are installing Flink Wordpress App Builder to the “App package name” field (example: com.flinkappbuilder.android). Then, click “Register App” button and proceed to the next step.
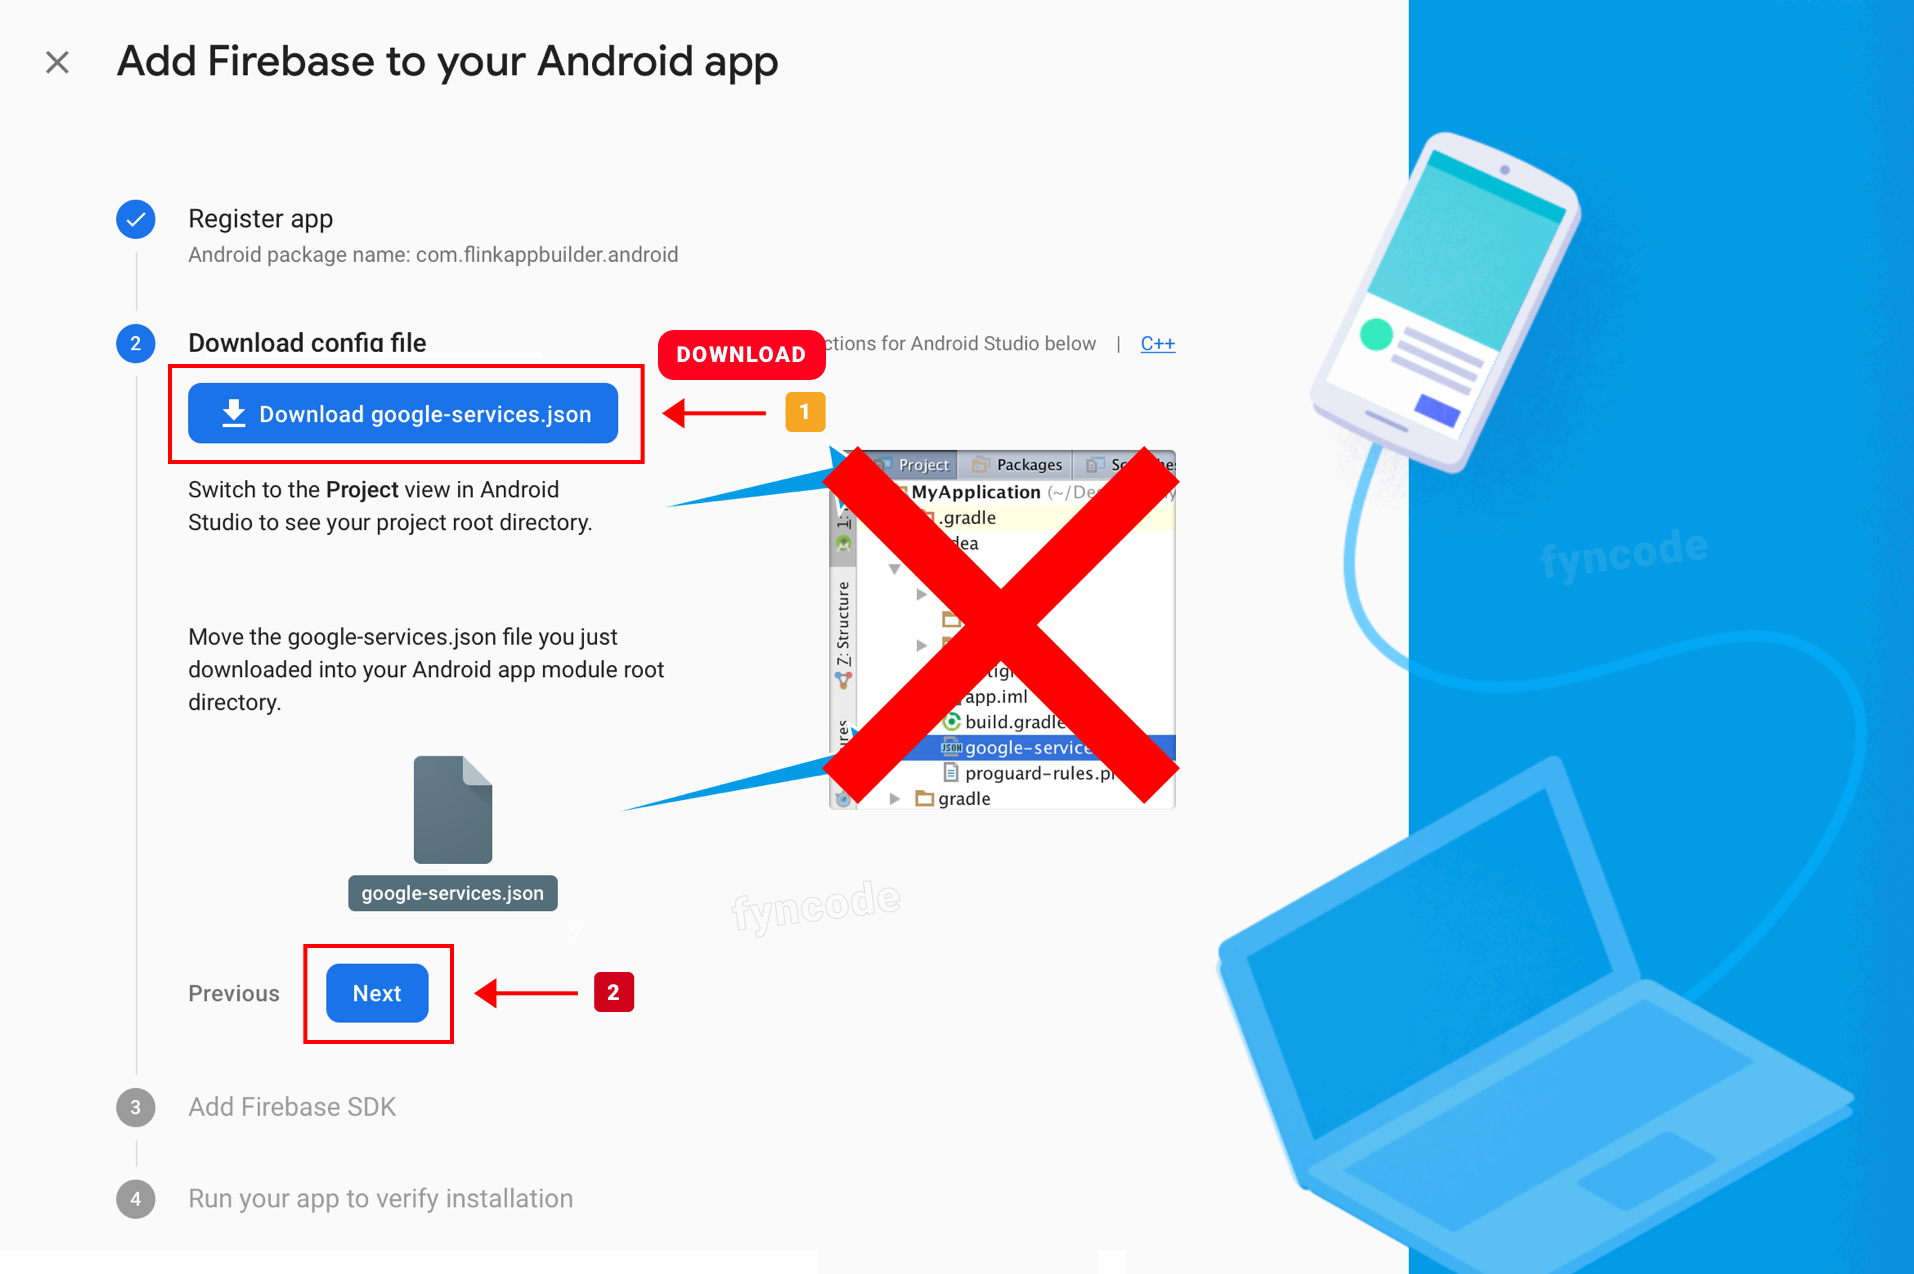
- Click “Download google-services.json” button, download the JSON file related with your app and click “Next”.
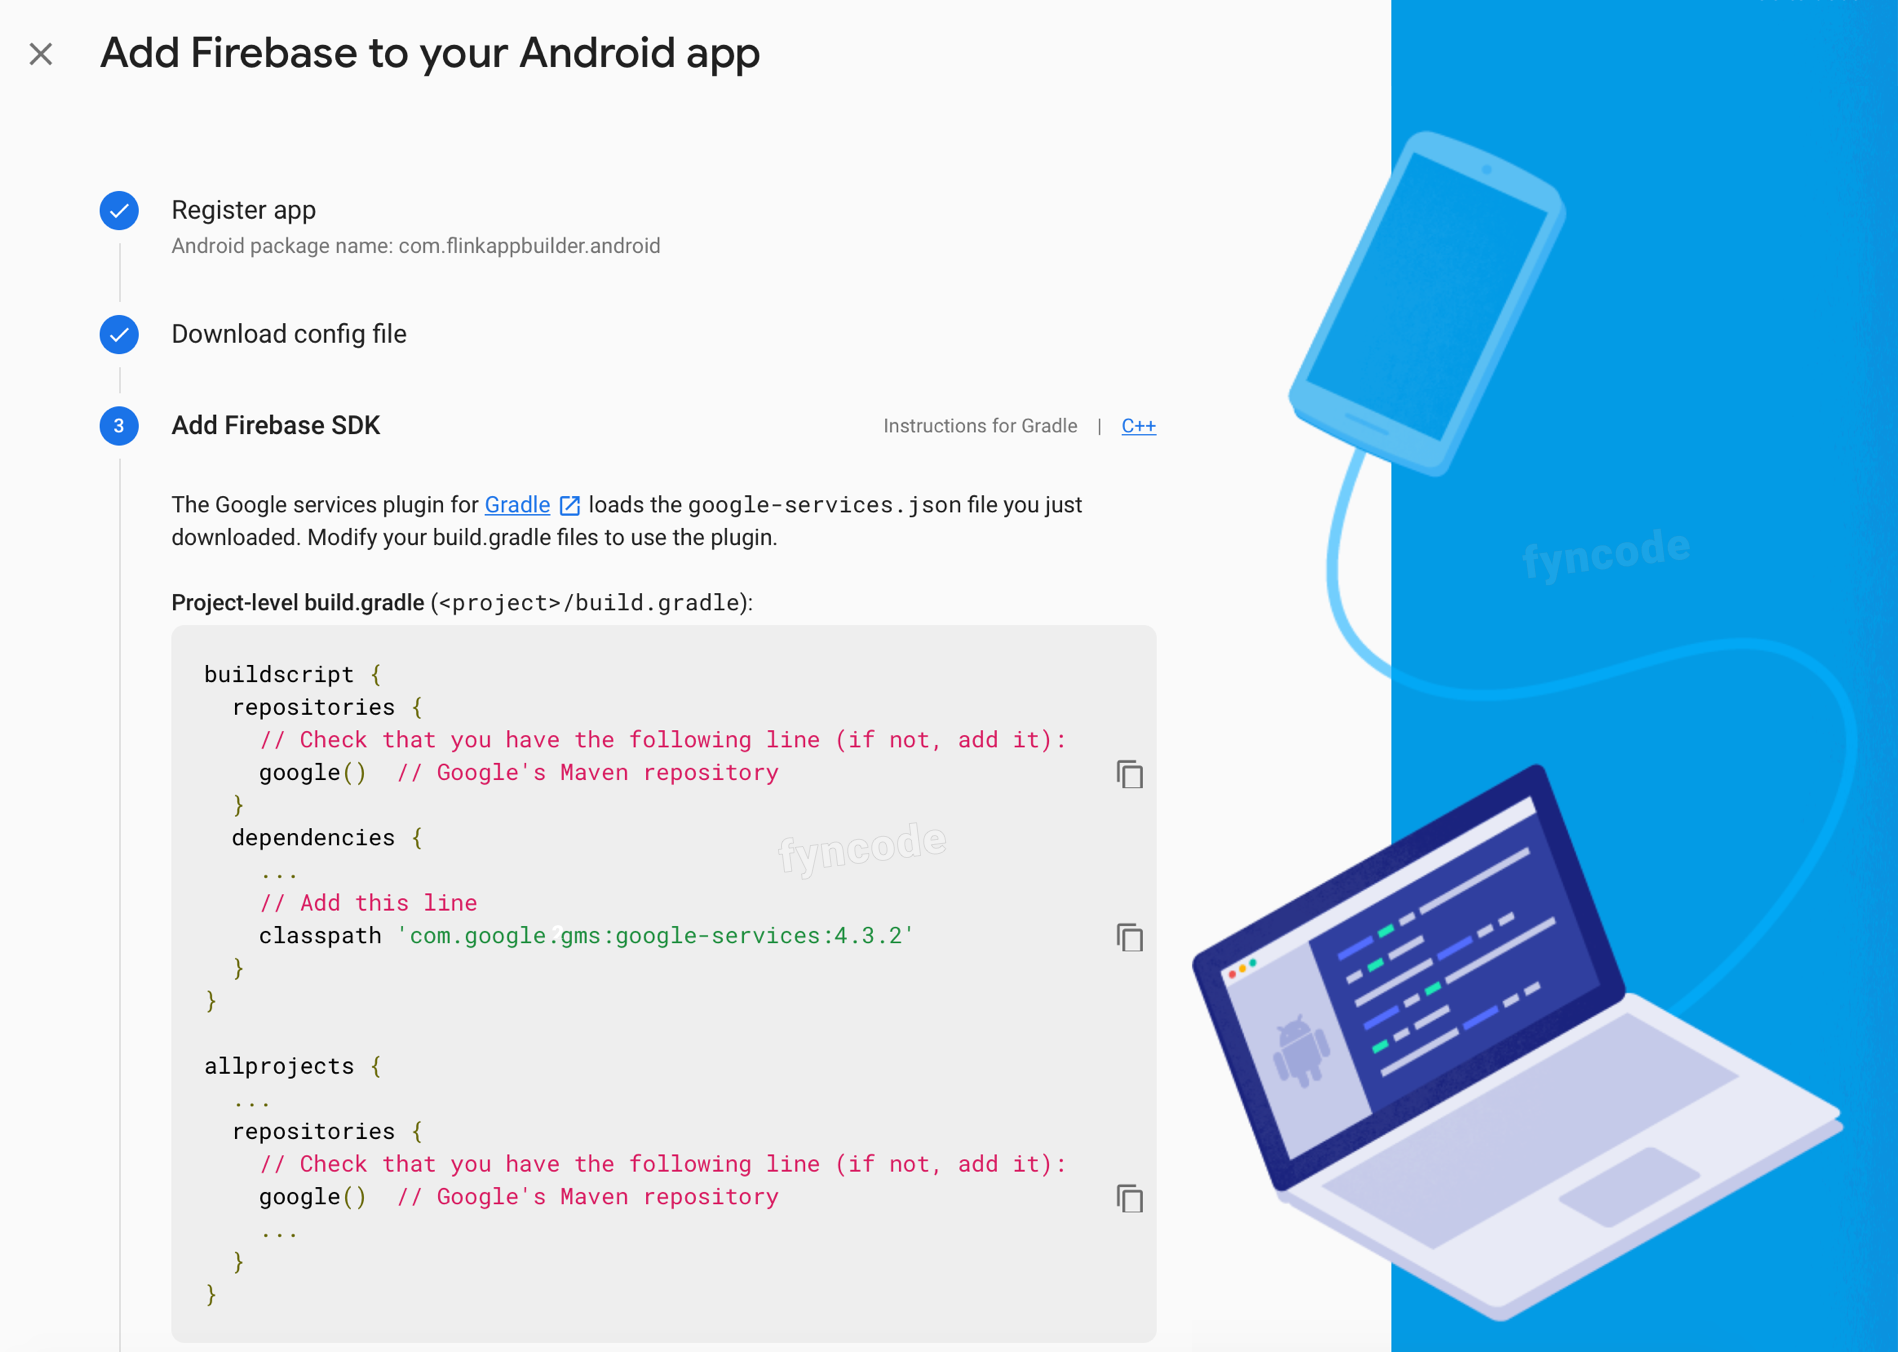
- You don’t need to do anything in this tep, just click “Next”.

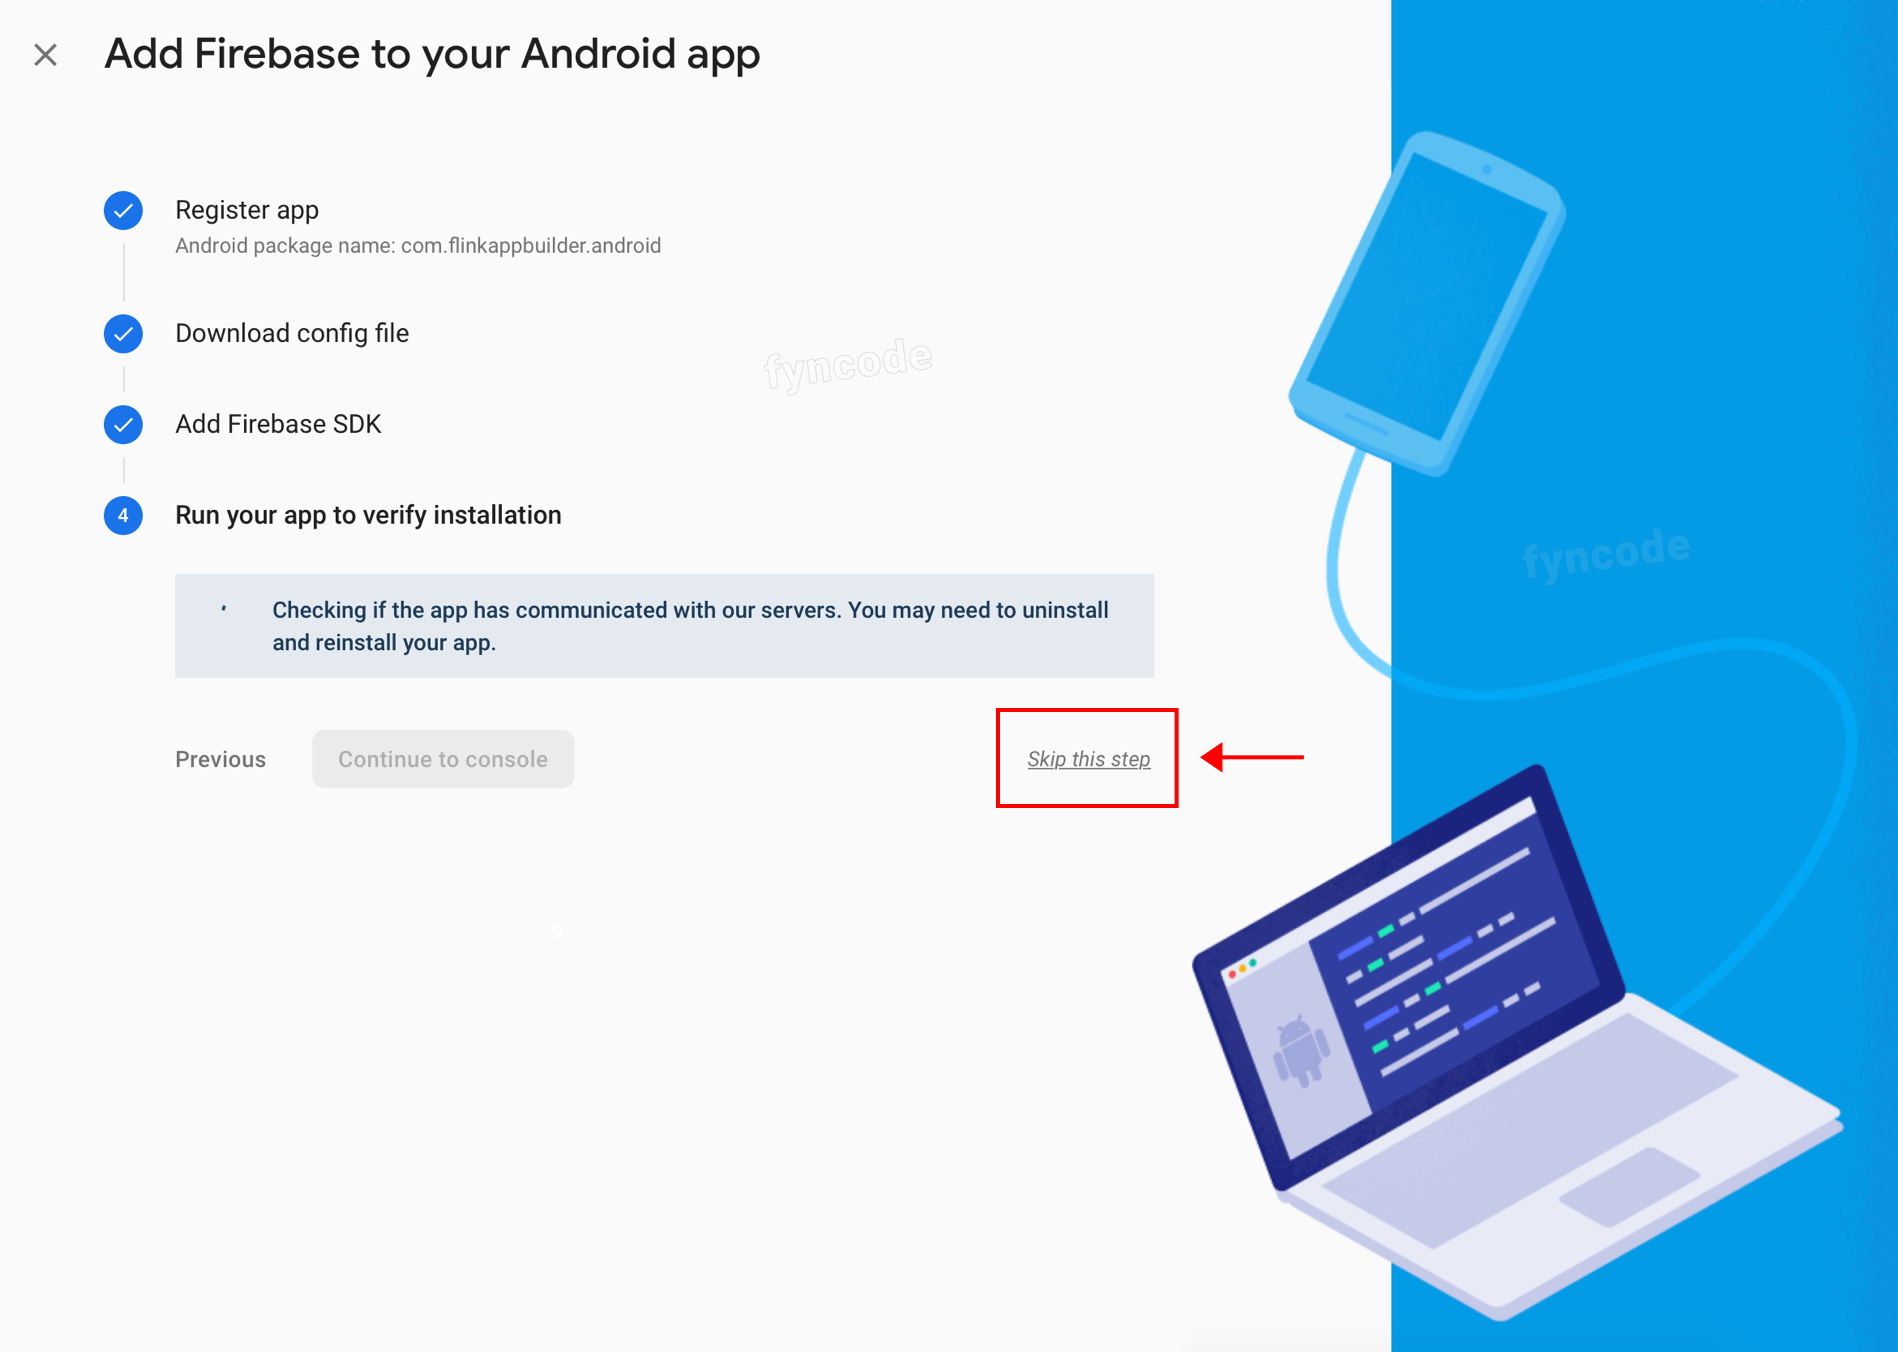
- Click “Skip this step” button.
- Login to your Wordpress admin dashboard and from the side menu, click “Flink App” in order to open the Flink WordPress App Builder page.
On this page, find “API Settings” and click it. Click “Upload New File” button in the “Configuration File” part of the “Google Firebase” section and upload the JSON file that you previously downloaded (google-services.json).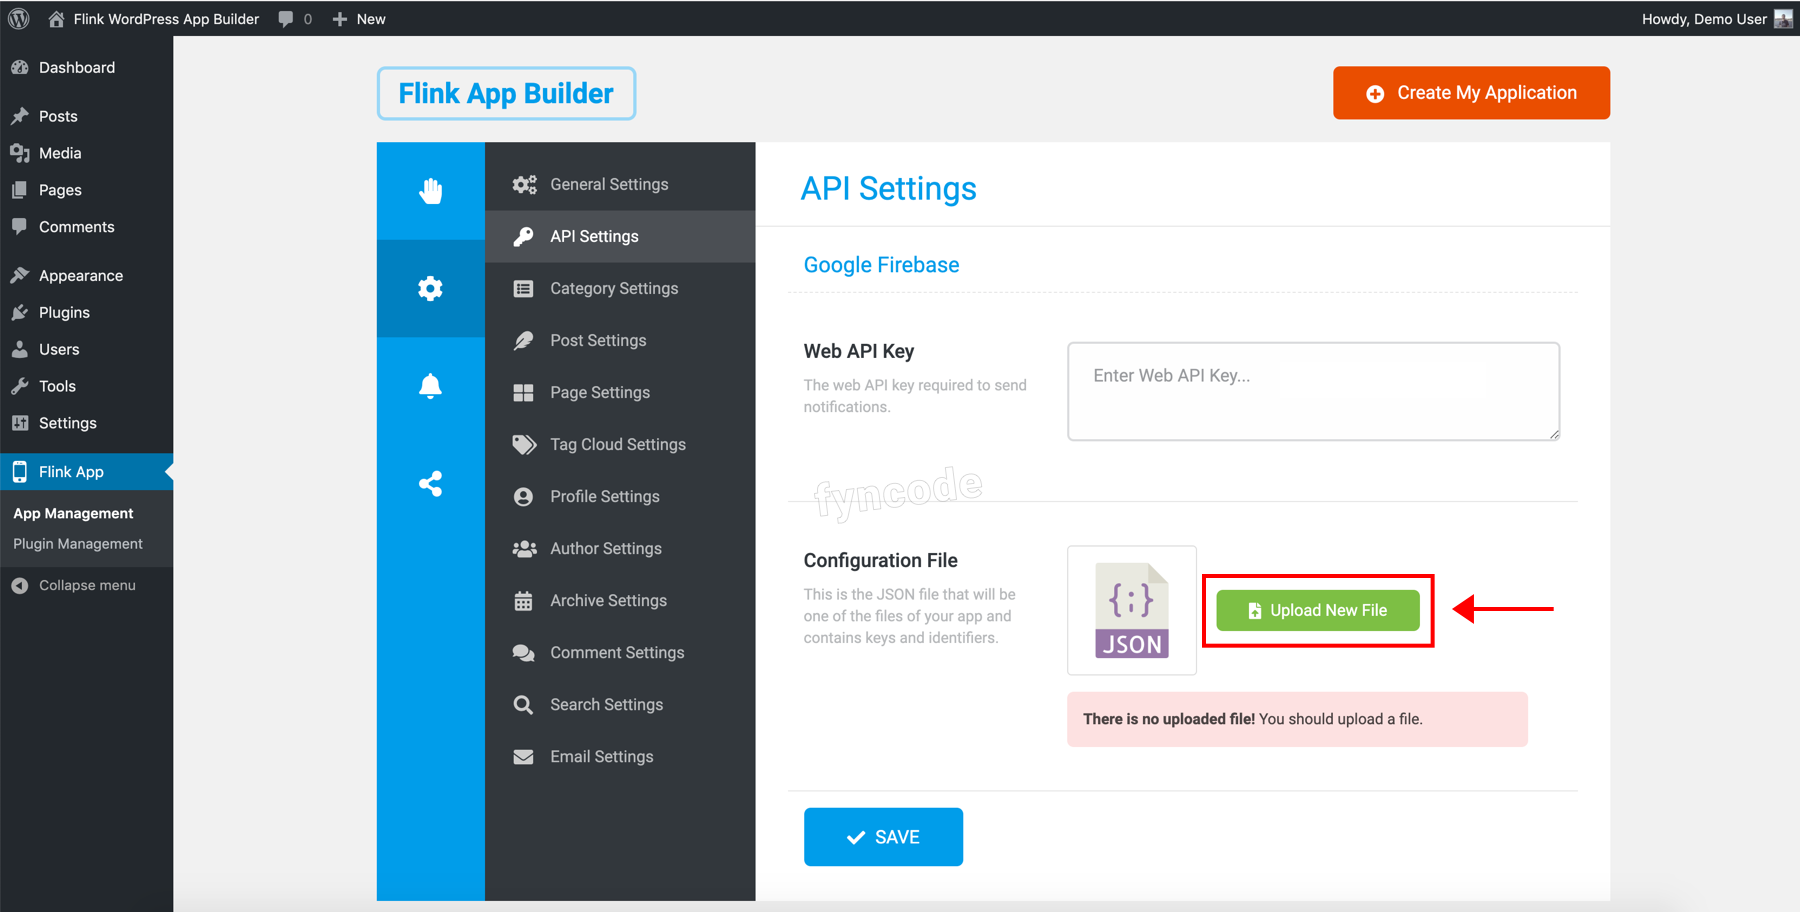
Getting the Web API Key
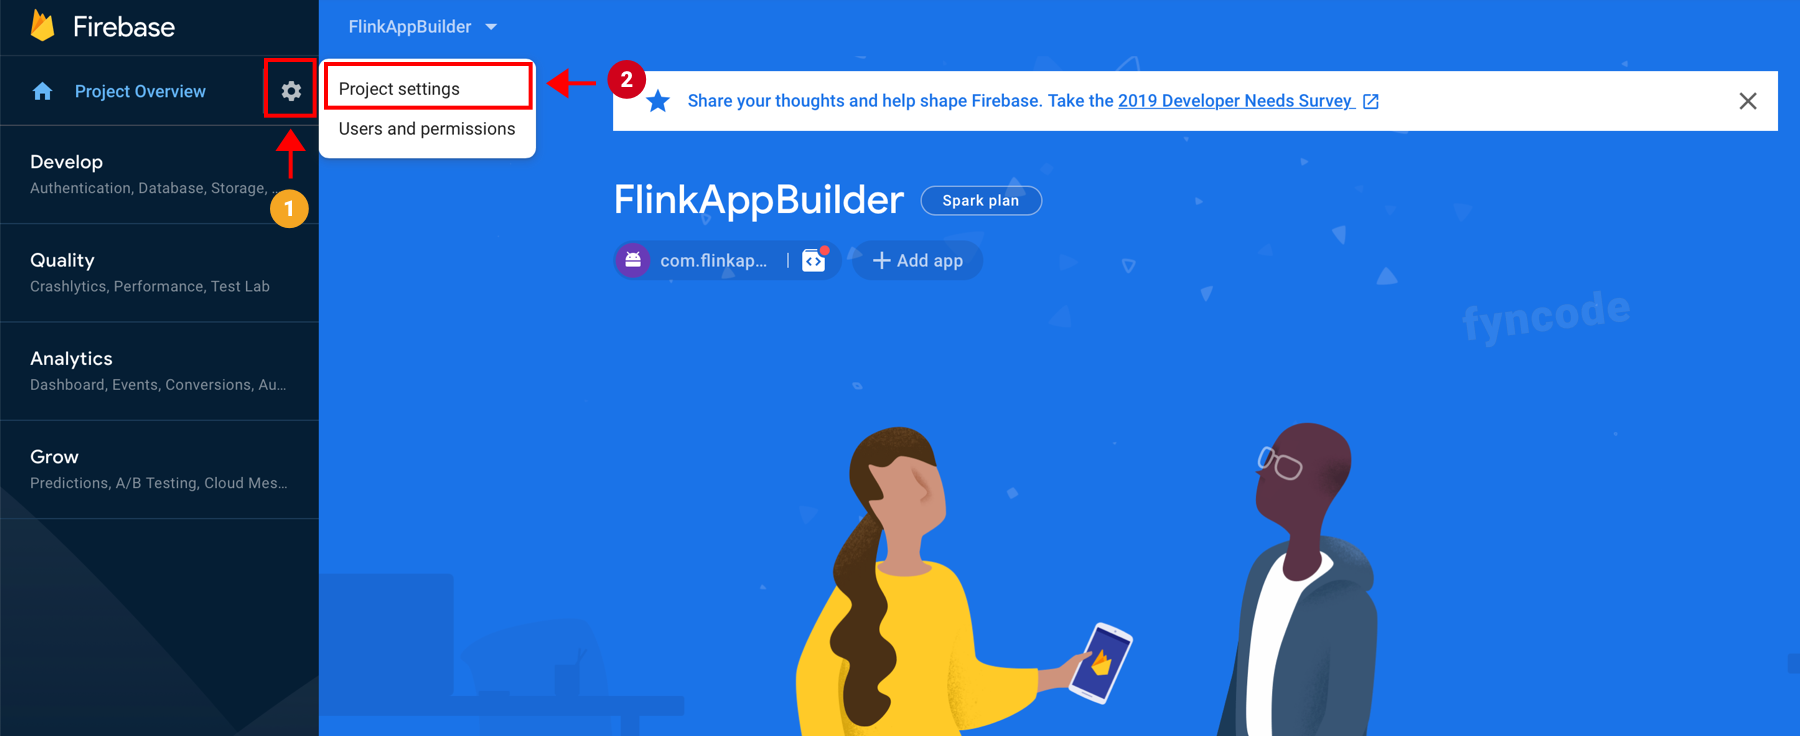
- Click on settings icon and then click “Project Settings” to go to the page where project settings can be configured.
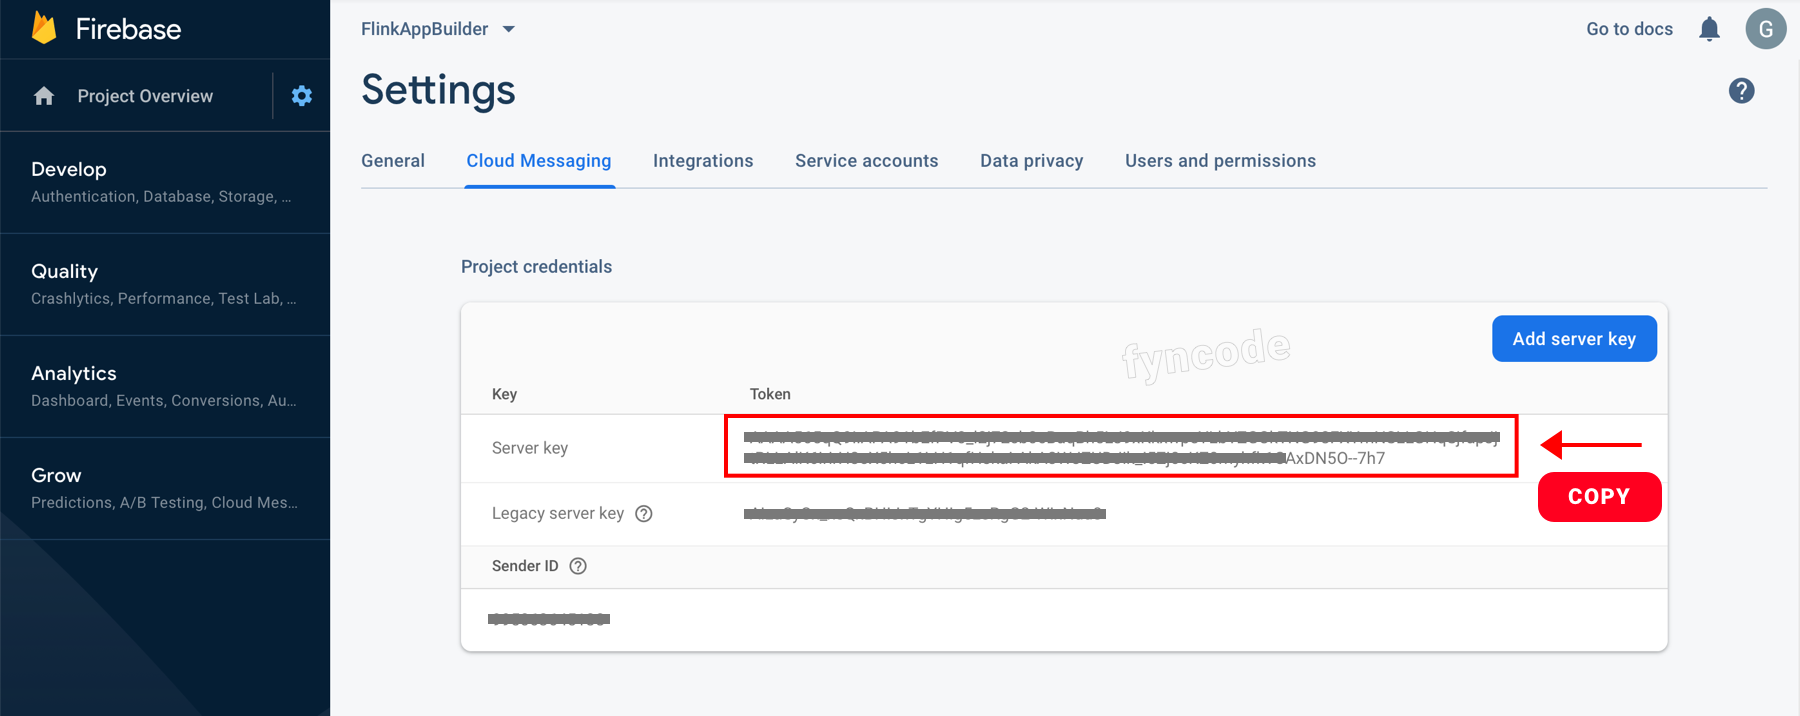
- Click “Cloud Messaging” button. Copy the key in “Server Key” field.
- Go to your WordPress admin dashboard and click “Flink App” on the side menu to open the page for Flink WordPress App Builder.
On this page, find and click “API Settings”. Copy the API key that you previously obtained and paste it to the “Server Key” field in the “Google Firebase” section, then click “Save” button.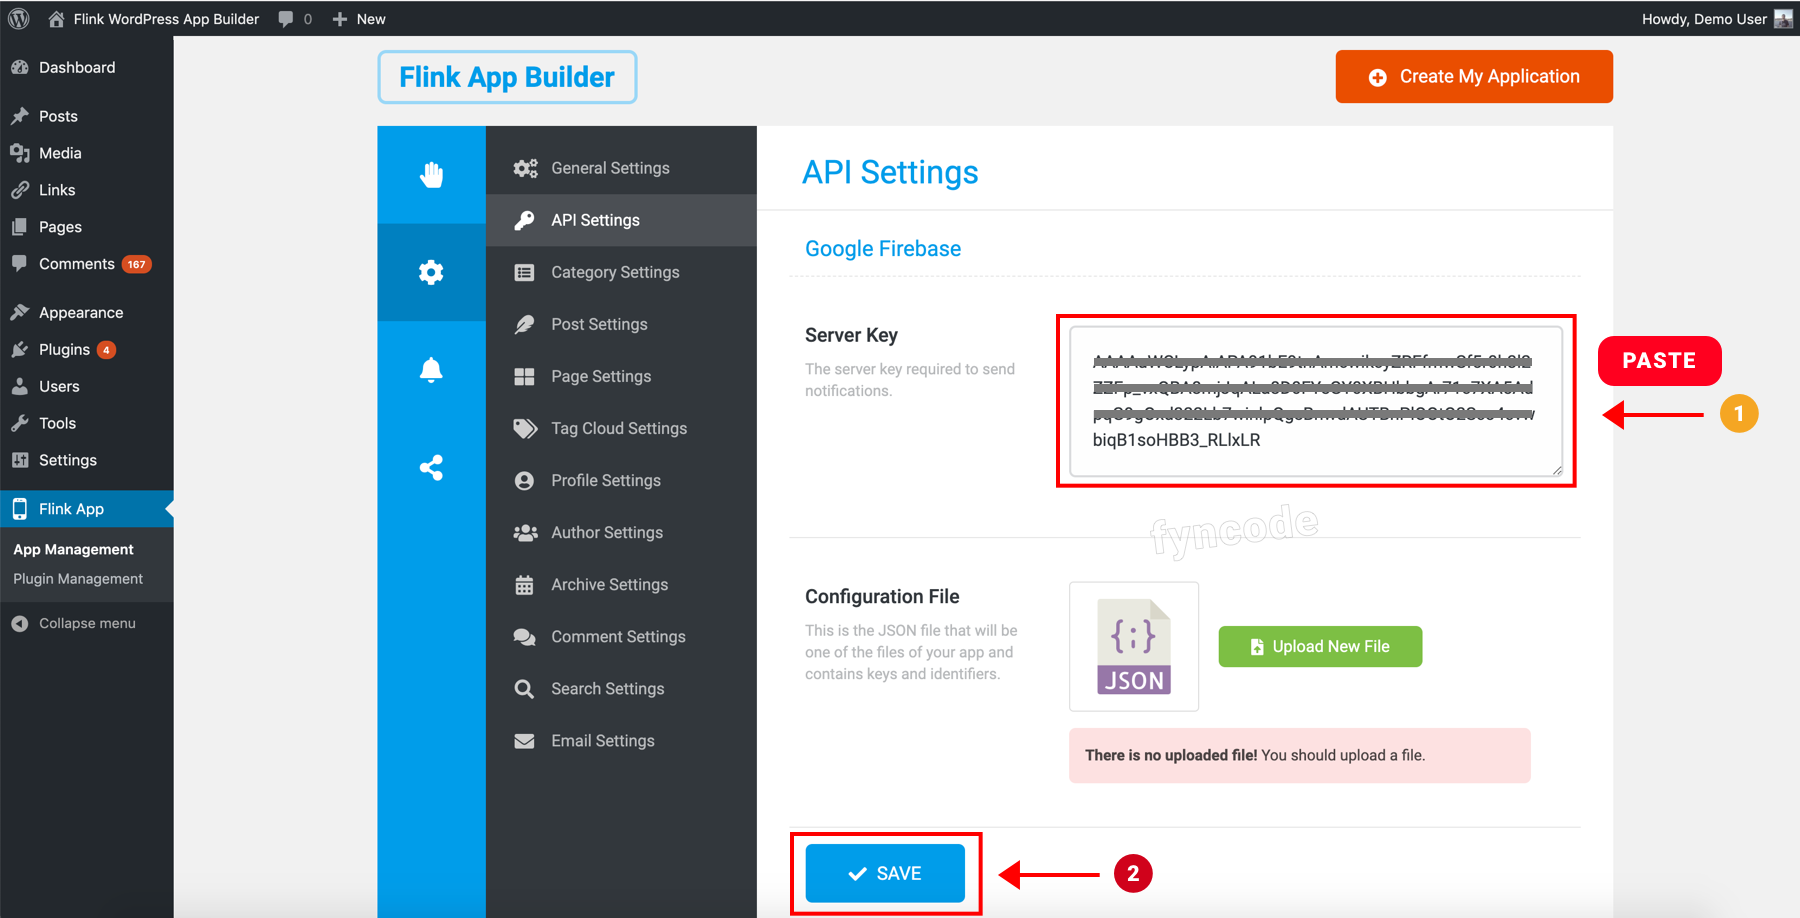
|
← Previous Section | Next Section → |
| Step 1 - Installation | Step 3 - AdMob Advertisement Integration |